Redis is an open-source (BSD licensed), in-memory data structure store, used as a distributed, in-memory key–value database, cache and message broker,. It can be combined with other databases like MySQL to provide a mechanism to cache your queries.
Most WordPress users use front-end static file caching to speed up their website. Similarly, we need to cache the backend by setup Redis object cache for enhancing server performance.

Redis object cache helps to store the MYSQL query in the RAM’s memory. When a user requests a page for the first time, a MySQL query is performed on the server. Redis caches this query, so when another user requests the same page the object cache will serve the output stored in RAM rather than hitting the fresh MySQL query.
In this article, we will discuss how to set up the Redis object cache to optimize WordPress database usage. Before installing Redis let’s discuss the WordPress Caching System in few words.
WordPress Caching System
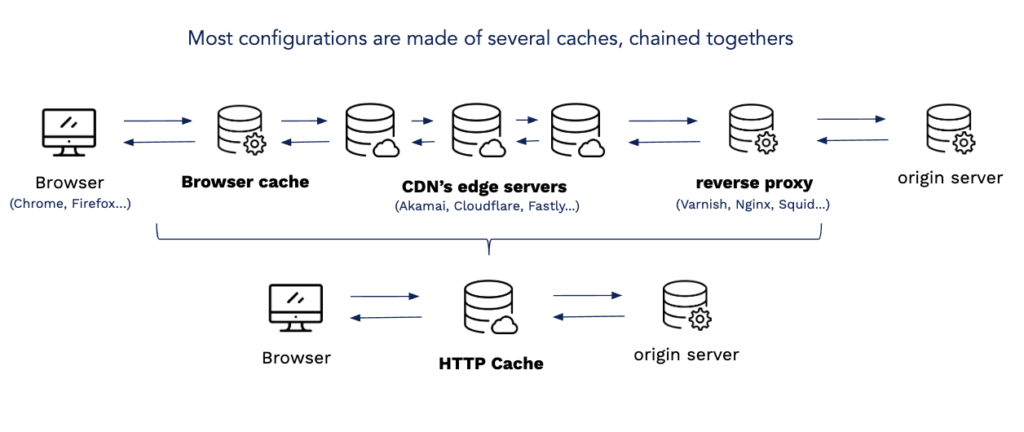
WordPress users usually understand at least two caching systems: page caching and browser caching.
Actually, there are many caching systems in WordPress, for example:
- page caching
- browser caching
- database caching
- object caching
- transient caching
- fragment caching
- opcode caching
- CDN caching
We divide them into three types:
1. Server-side Caching: caching at the server level. NGINX FastCGI cache and Varnish page caching are two examples of server-side caching. Another example of server-side caching is object caching.
2. WordPress-side Caching: caching at the WordPress level. We are using many popular caching plugins like W3 Total Cache, WP Rocket, WP Super Cache these all are the example of WordPress-side caching.
3. Client-side Caching: caching at the local browser level. Browser cache is an example of client-side caching.
- Once you visit your website, your browser saves the static data of your website, such as images, CSS, and javascript files.
- Everytime you visit your website again or hit the F5 button to refresh your website, static data will be served from the local browser cache.
Install Redis Server
Here I’m using Ubuntu 20.04 LTS to perform these steps. We are using redislabs/redis repository to download the latest stable version of Redis and install it on our Ubuntu server.
$ sudo add-apt-repository ppa:redislabs/redis

$ sudo apt-get update

$ sudo apt-get install redis-server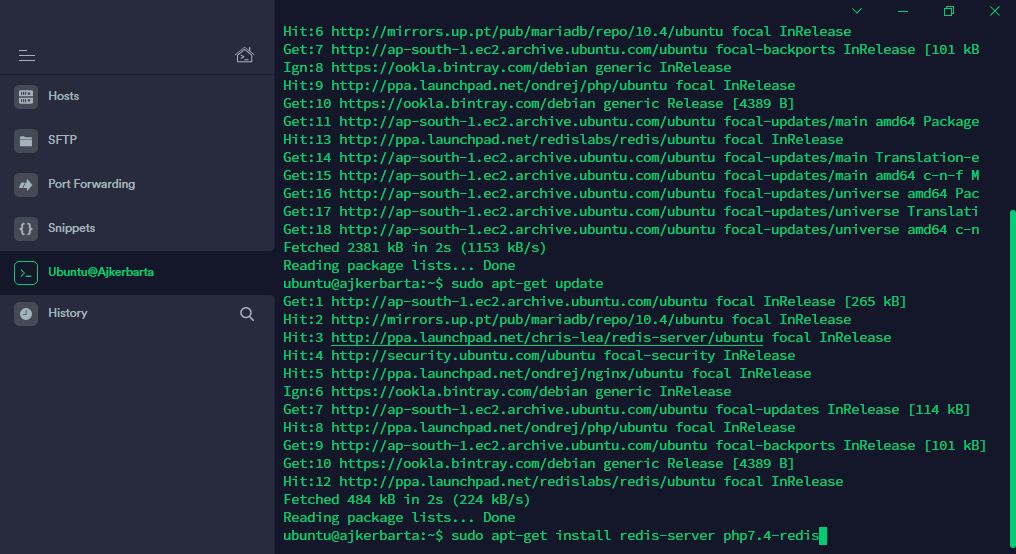
You can check the version number to see if the installation has been completed correctly. To check the version number, use the below command:
$ sudo redis-server -v

# Output: Redis server v=6.2.1 sha=00000000:0 malloc=jemalloc-5.1.0 bits=64 build=81a84d60f8ac9371
Since we are playing with WordPress so we need to install a PHP extension called PhpRedis. Now we install the php7.4-redis module for supporting the WordPress Object caching.
$ sudo apt-get install php7.4-redisConfigure Redis Server
Now that we have installed the Redis server, we will adjust the configuration file to improve its default configuration. Edit the redis.conf using below command:
$ sudo nano /etc/redis/redis.confNow uncomment maxmemory and maxmemory-policy and set its value.
maxmemory 128mb

maxmemory-policy allkeys-lfu
Now save the file using Ctrl+X 🠒 Y and hit Enter. Now, restart the Redis server and php7.4-fpm using below command:
$ sudo service redis-server restart

$ sudo service php7.4-fpm restart
We configured the Redis server now it up and running on the Ubuntu Cloud server. Run the below command, if the output like this, everything is all right and you are ready to go to the next step.
$ redis-cli ping

#Output: PONG
Setup Redis Object Cache for WordPress
We have successfully setup Redis from server end. Now we will set up the Redis to run as Object Cache for WordPress Database queries.
The process is really simple. We just need to install a WordPress Plugin called Redis Object Cache by Till Kruss and enable the Object Cache.
Follow the below steps for Redis Object Cache on WordPress:
- Login to WordPress Dashboard
- Open wp-config.php file and add the following line:
define('WP_CACHE_KEY_SALT', 'yourdomain.com');- Navigate to Add New under Plugin menu
- Search and Install Redis Object Cache by Till Krüss or download from here:
- Activate the Plugin and navigate to Settings > Redis
- Press the Enable Object Cache button
- That’s it!
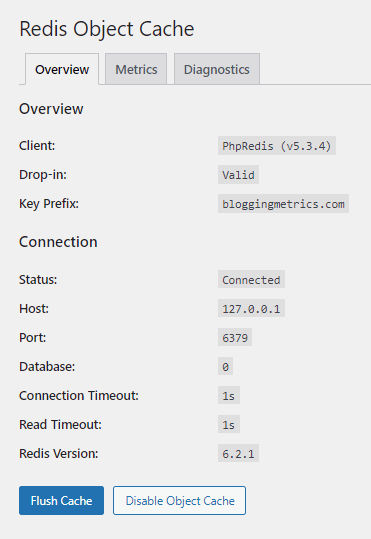
The Plugin will automatically add the required files in our WordPress server directory and enable the Redis Cache for MySQL database optimization.
Monitoring Redis Object Cache
We have completed the setup with Redis Server configuration as well as using it on WordPress for Object Cache. In order to monitor Redis Object Cache performance, we can run the following command in the SSH console.
$ redis-cli monitor

#Output: OK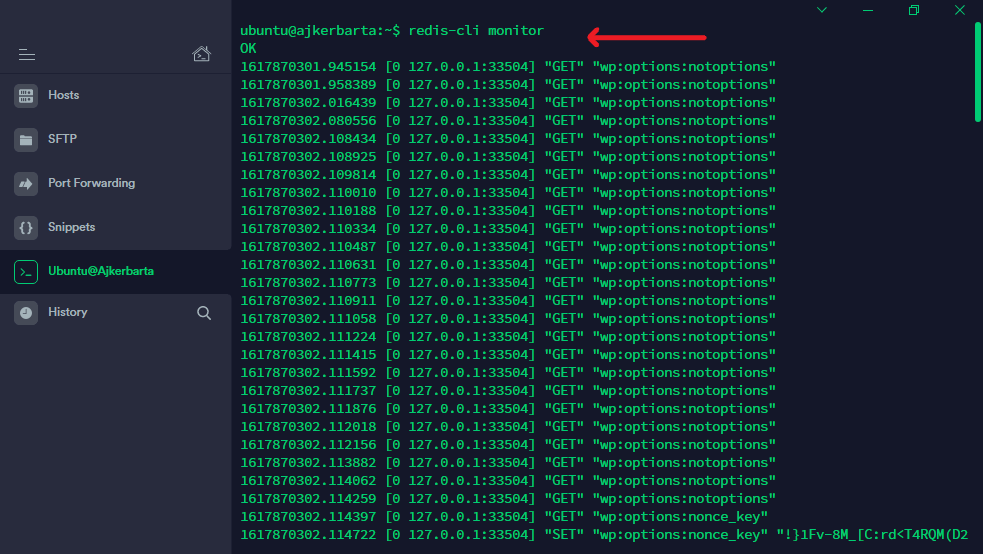
Summary
After following this steps Redis Object Cache is successfully configured with WordPress.
If you’ve any thoughts on Setup Redis Object Cache to Optimize WordPress Database Query, then feel free to drop in below comment box. If you find this article helpful, please consider sharing it with your network.



Hey,
Tremendous of saying about Setup Redis Object Cache to Optimize WordPress Database Query successfully configured with WordPress. by the way looking awesome graphical presentation.
Really amazing knowledge. Thanks for posting!
Thank you Nancy.